Motor Focus Kit v2 (Universal)
Fokussieren Sie Ihr Teleskop schnell und präzise mit unserem leistungsstarken Motor-Fokus-Kit v2. Diese hochauflösende Getriebebox hat eine Schrittweite von 0,06 Grad und kann problemlos mehr als 6 kg (pro cm) heben. Sein hohes Drehmoment eignet sich zum Heben schwerer Bildgebungsgeräte. Außerdem hat das Getriebe des Motors ein geringes Spiel, das mit Hilfe der Spielkompensation in der Bildgebungssoftware leicht eingestellt werden kann. Die RJ45-Buchse kann auf ein kompatibles Robofocus-Pinout umgestellt werden.
Hinweis: Für den Antrieb des Motors benötigen Sie außerdem einen Motorcontroller.
Folgende Produkte können das Motor Focus Kit ansteuern:Dual Motor Focus Controller
Ultimate Powerbox v1 und V2
eXternal Motor Controller
Universal L Shaped Bracket (Black Anodisation)

Universelle L-förmige Halterung (schwarz eloxiert)
Wir haben die L-förmige Halterung so umgestaltet, dass sie leicht auf die meisten auf dem Markt befindlichen Fokussierer passt.
Der untere Teil der neu gestalteten Halterung kann durch eine schlankere Schiene (im Lieferumfang enthalten) ersetzt werden, um eine bessere Kompatibilität mit Newton- und anderen Niedrigprofilauszügen zu gewährleisten.
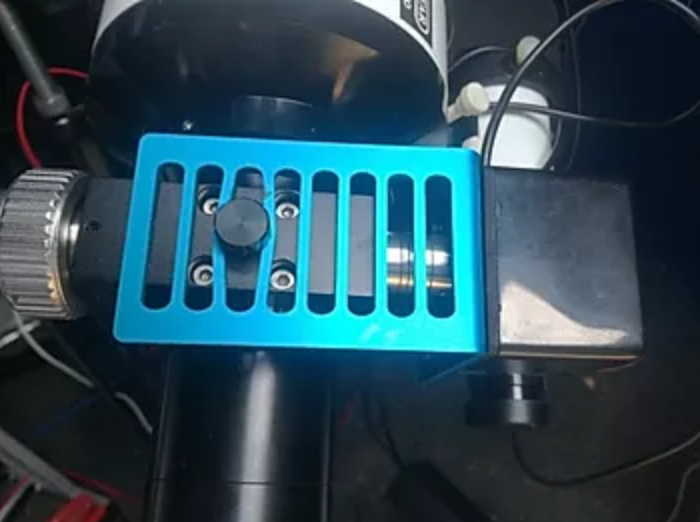
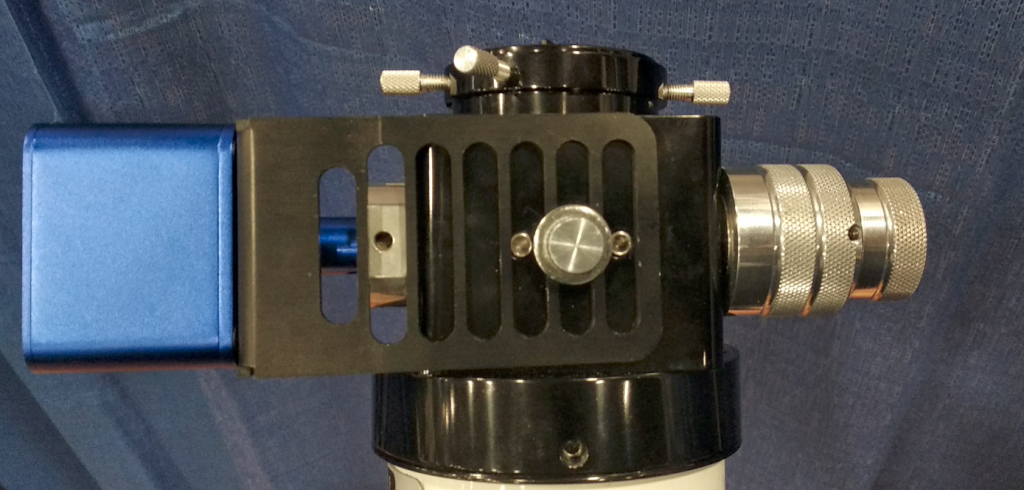
Diese L-förmige Halterung aus schwarz eloxiertem Aluminium, die schwer zu biegen ist, hat geschnittene Schienen und kann an einer Vielzahl von Okularauszügen angebracht werden.
In der Tat haben wir es erfolgreich installiert auf:
Baader Diamond Steeltrack
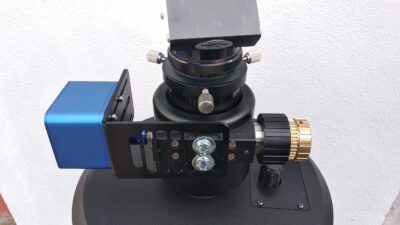
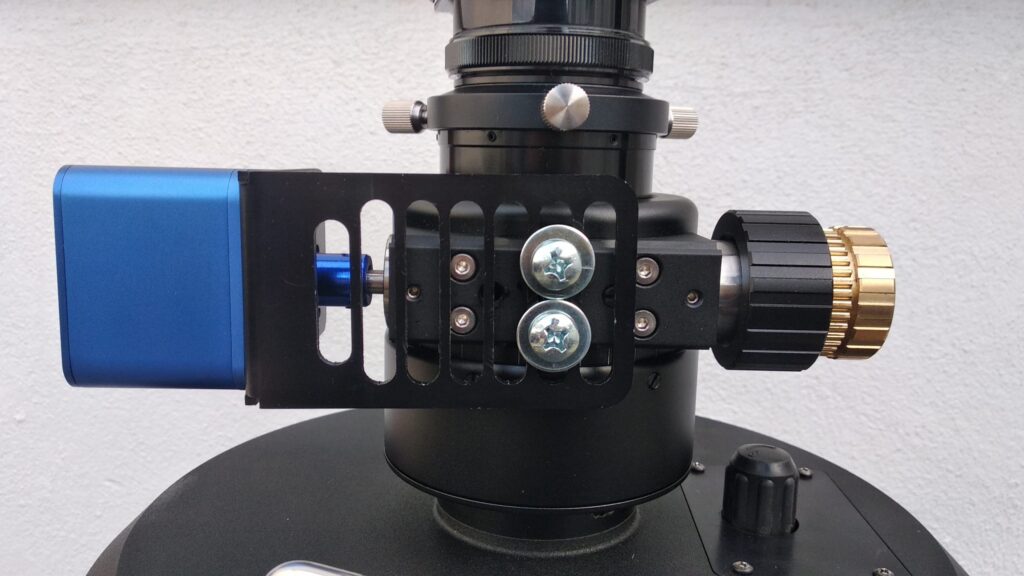
Die folgenden Fotos zeigen, wie man den Motor an einem Baader Steeltrack Fokussierer befestigt
-
Bellow photos show how to attach the motor on a Baader Steeltrack Focuser

-

Anleitung:
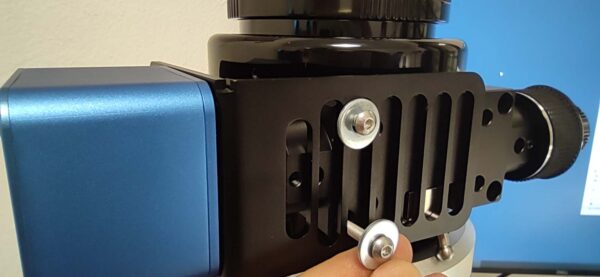
Entfernen Sie die Kunststoff-Madenschrauben (die keine eigentliche Verwendung haben) von der Unterseite des Steeltrack Auszuges.
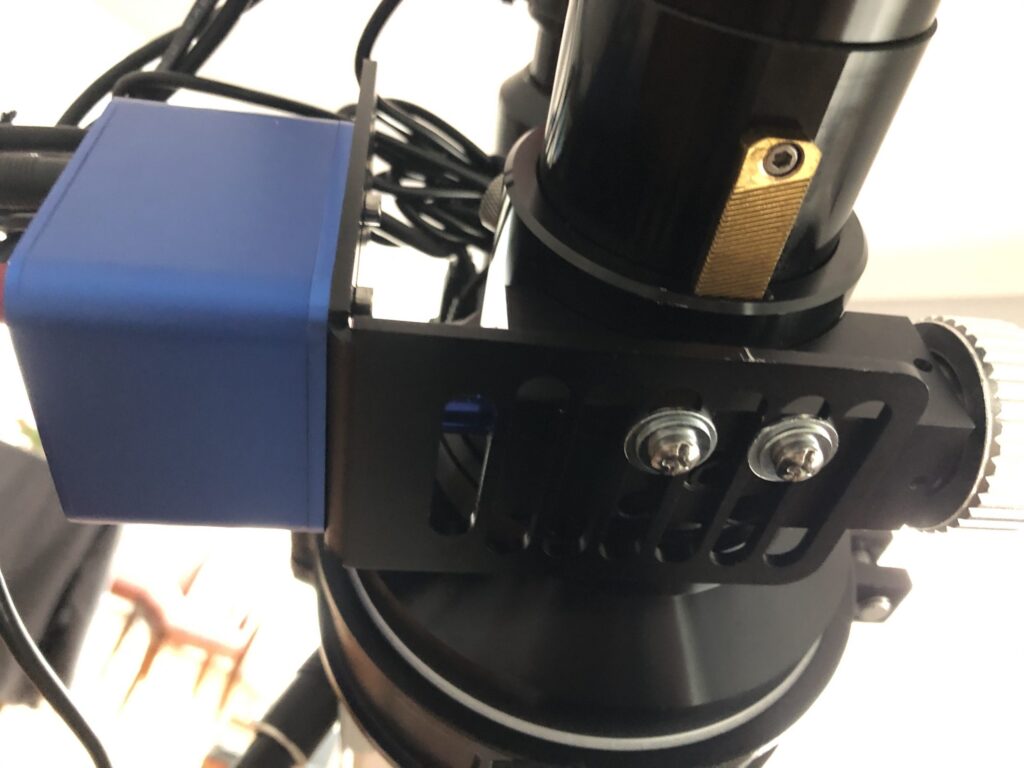
Richten Sie die L-förmige Halterung am Okularauszug aus und verwenden Sie die mitgelieferten Schrauben und Abstandshalter, um die L-förmige Halterung wie unten gezeigt zu befestigen.
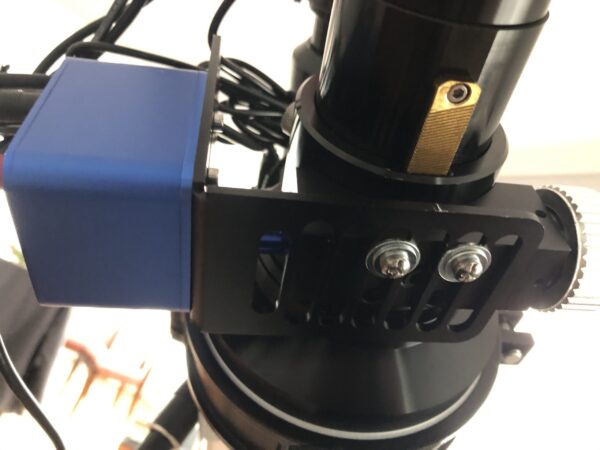
Explore Scientific Focuser
Wir haben den Motor erfolgreich installiert:
- Explore Scientific ED Series (ED80, ED102, ED127, ED152)
- Explore Scientific ED-FCD100 Series (ED80-FCD100, ED102-FCD100, ED127-FCD100)
- Explore Scientific FPL53 (ED140, ED115)
-
We have successfully installed our motor on:
- Explore Scientific ED Series (ED80, ED102, ED127, ED152)
- Explore Scientific ED-FCD100 Series (ED80-FCD100, ED102-FCD100, ED127-FCD100)
- Explore Scientific FPL53 (ED140, ED115)


MoonLite Focusers
Moonlite-Howto Download
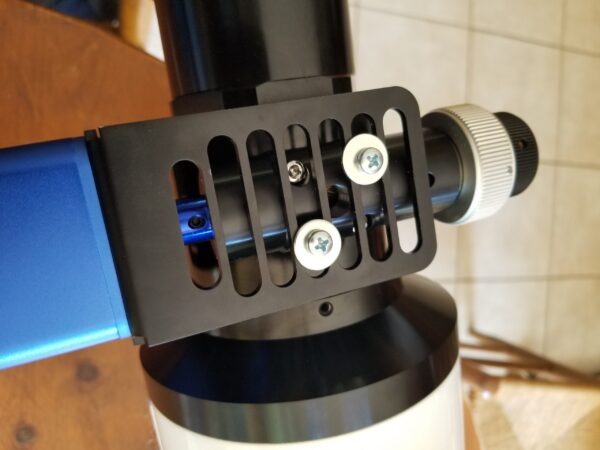
Skywatcher Esprit Series Focuser
Wir haben den Motor erfolgreich installiert:
Skywatcher Esprit Series (80 ED, 100ED, 120ED, 150ED).
Suchen Sie die Stellschraube, die auf dem Foto unten mit einem roten Pfeil markiert ist. Verwenden Sie einen Sechskantschlüssel, um diese Stellschraube zu entfernen.
We have successfully installed our motor to:
Skywatcher Esprit Series (80 ED, 100ED, 120ED, 150ED).
You can also watch the following video for the Esprit 100 installation
Locate the set screw pointed with red arrow at below photo. Use a hex key tool to remove this set screw.

Remove the coarse knob
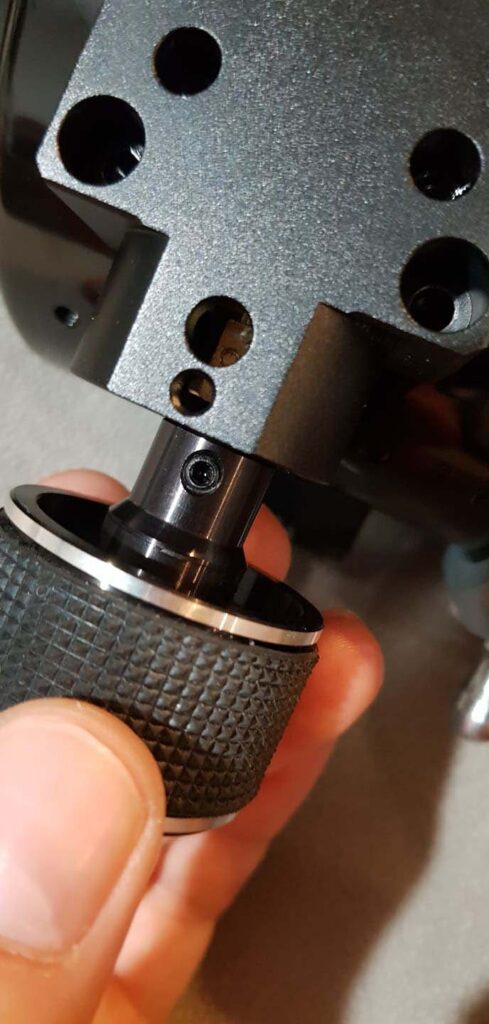
Use the supplied 5 to 6mm motor coupler and attach it to the focuser’s shaft.
Pass through your hex key tool into the small hole (pointed with red arrow) and securely tighten the set screw of the motor coupler.
Turn using your hand the focuser knob to reveal the 2nd set screw of the coupler. Make sure to tighten both set screws very well.

Remove the two outer bolts using the hex key tool (check below photo).
You do not need these screws anymore. Keep them in a safe place.
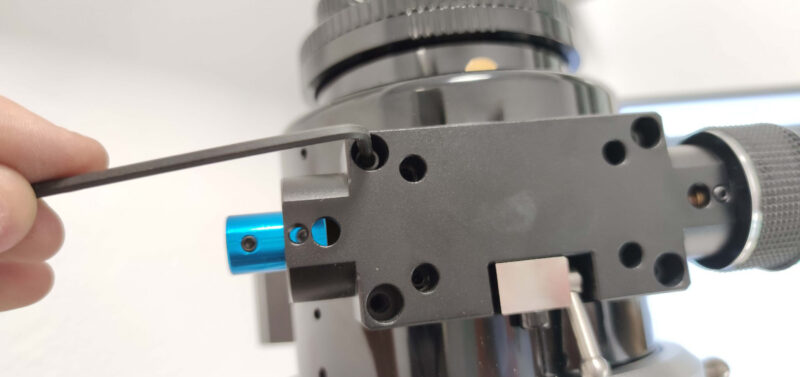
Please note that the thumb screw of the finder holder collides with the motor L shape bracket so there are two options to avoid this.
a) Rotate the finder holder 180 degrees, as displayed below.
b) Detach and place the finder holder on the opposite side where there is a hidden screw thread under the label (as shown in the image below)

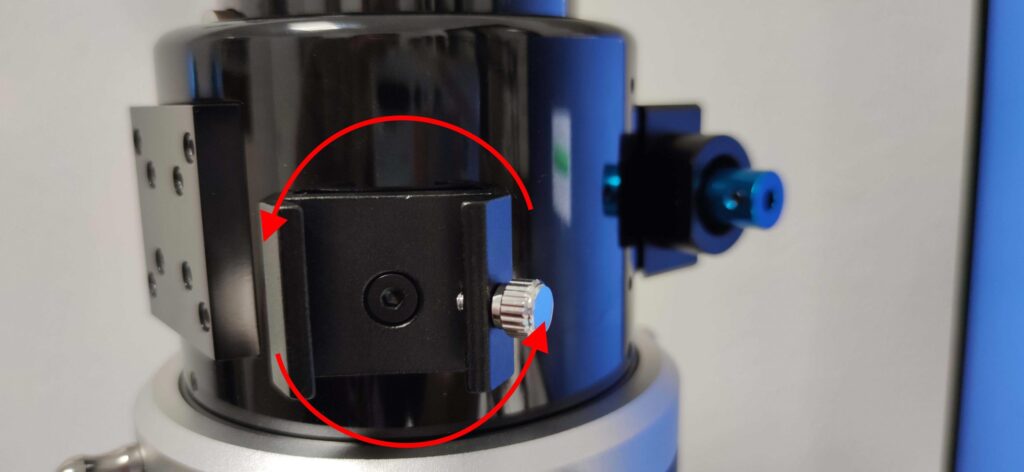
Place the motor on the bracket and align the motor shaft to the “already placed” motor coupler. Secure the motor with the bracket by tightening all 4 bolts.
Be sure to have the set screws of the motor coupler on top. This is required to allow you to have access to them by using the hex key tool. Do not tighten the coupler set screws of the motor side yet!

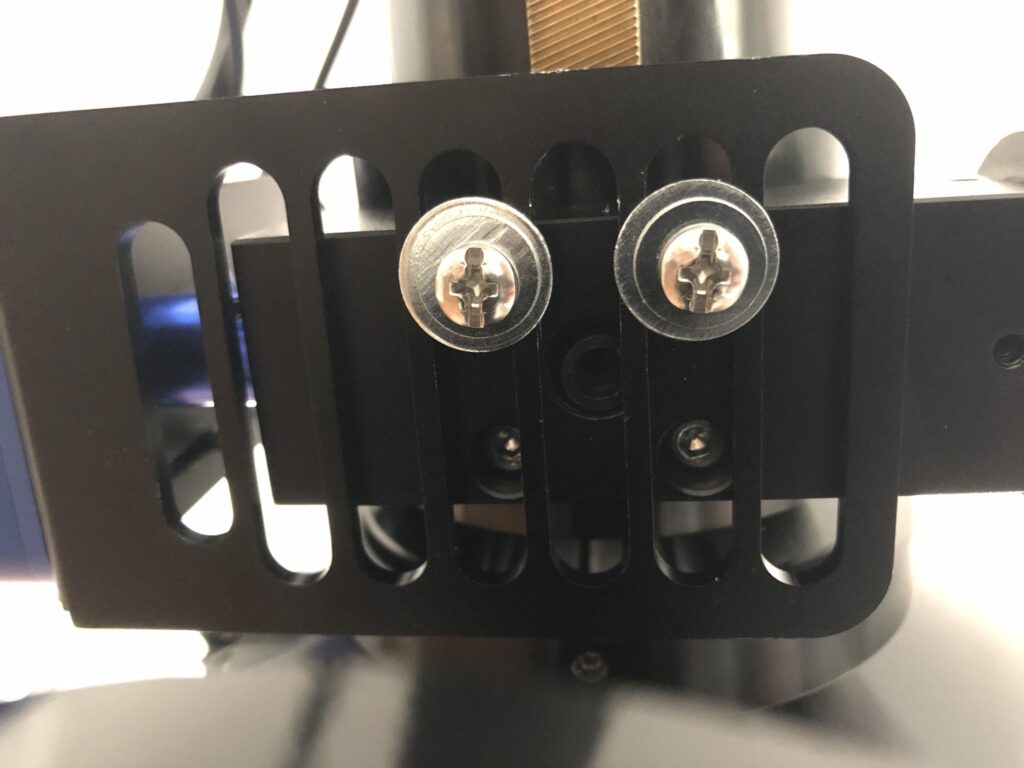
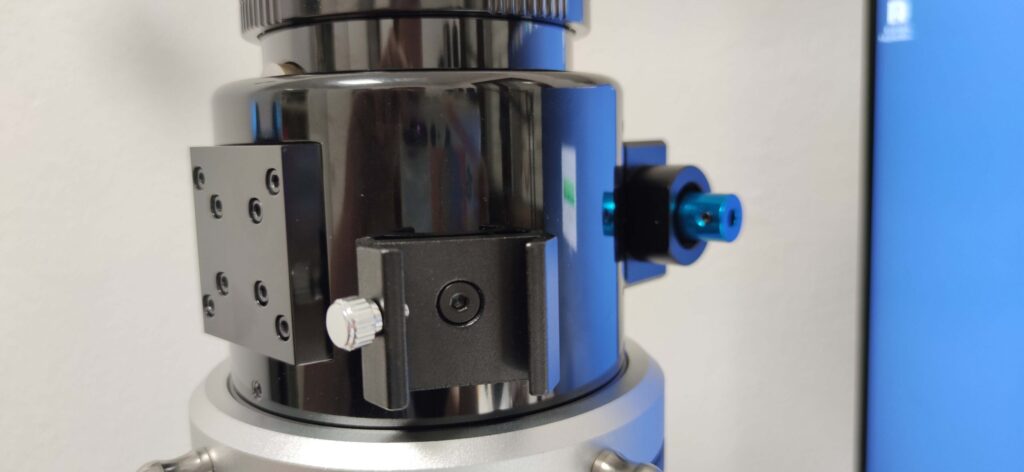
Use the longer supplied screws (M4x30mm) and spacers and use them to attach the L bracket on the focuser. Place these screws into the 3rd slot from the left of the bracket (check the photo below)
Do not fully tighten them yet!
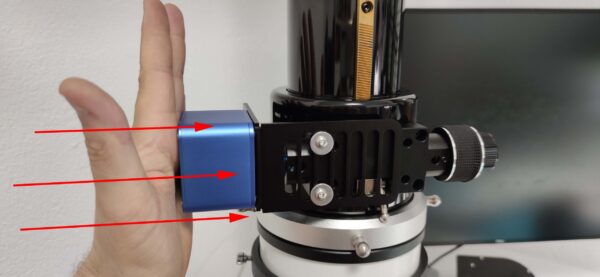
Push the motor close to the telescope (as displayed below).
Tighten all set scews of the motor coupler
Please note that the brake clutch should not be used. Motor has a powerful gearbox which acts as a brake when motor is not rotating.
")