- Details
- More images
Products description
Repair of a Meade LX200 16'' mount
Product Description
This time, it was again an older Meade LX200 model: a mount for a 16" telescope.
Let's just say that we love the older models: They have rock-solid, metal mechanics, are robust and cleanly constructed, and with a little care and minimal exposure to moisture, you'll enjoy them for a long time. And even if something does go wrong, they can often be easily serviced and the problem can be resolved permanently.
Symptoms:
The mount of this Meade 16" LX200 had been neatly retrofitted with a controller. And it worked well electronically.
Unfortunately, the mechanics made scratching/rattling noises during use, or even locked up completely.
Otherwise, the mount was in good condition (considering its age).
Troubleshooting:
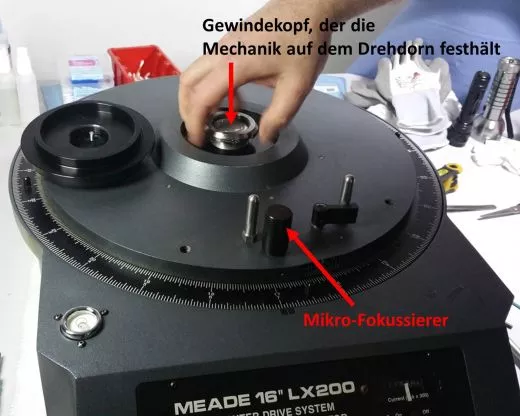
During the initial functional tests, the mechanism surrounding the micro-focuser proved to be stubborn. The micro-focuser sits on top of the mount (see series of images) and allows for fine manual tracking or aiming when observing objects by rotating it.
If you turn the Meade LX 200 mount upside down (control panel facing down - see attached images) and carefully remove the protective cover, the motor with the worm gear is quickly exposed.
The worm gear is pressed against the large lower gear by a spring. Even though the worm gear didn't mesh perfectly with the gear at first (we fixed this later), both seemed to work together and weren't the cause of the problem.
On this Meade LX200, the large gears (two in total) are located in and on the heavy cast-iron housing made from the iron mandrel on the other side of the housing.
In other words, you first have to carefully loosen and remove the worm gear with the motor block.
CAUTION: Handle the connected (or then detached) circuit board and electronics with care and wear gloves to prevent oil or grease from coming into contact with the electrical components! It's best to protect them with an anti-static cloth.
Once you've done this, put the mount back the right way up – it's best to do this with two people to avoid pinching the motor and other components.
Then remove steel plate after steel plate. These are attached with 6-inch screws and can be easily removed from each other.
It's essential to lift the plates out as parallel as possible to prevent them from jamming on the mandrel in the middle.
At the very end, you'll expose the last large gear (under the degree indicator ring) and thus also the mechanism of the microfocuser.
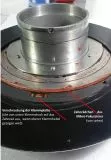
The Micro Focuser is a metal pin located in the plastic housing, with a small metal gear (approx. 8 mm in diameter) at its other end. A grub screw (through a horizontal hole) acts on this gear from the side of the housing, pressing it against the large gear. In this case, the mechanism connecting the grub screw and metal gear to the large gear had become somewhat worn, so that the small gear no longer meshed correctly on all gears.
This revealed the cause of the originally described blockage: The worn gears repeatedly lined up point to point, jamming/blocking each other.
Solution:
There were now three possible solutions:
1) Replace the worn gear, which won't be easy, as the diameter and length must match. A major undertaking, but not impossible.
2) Tighten the grub screw repeatedly and regularly check that the focuser is correctly positioned. This would be quite time-consuming to maintain in the long run.
3) Or remove the micro-focuser - which wouldn't be a big problem with a 16" telescope, as this size telescope can also be easily tracked by hand.
Since this telescope (as described above) actually tracks purely electronically via the controller, a decision was made together with the customer to remove the small nuisance.
The micro-focuser cannot be removed here, as is usual with smaller Meade telescopes, by removing the grub screw on the plastic knob and pulling out the metal pin. Instead, the gear is firmly attached to the pin, and this pin is attached to the plastic knob.
The gear is held in place only by the set screw on the side of the housing and the pin clamp in the housing. You need to carefully tap out the gear (on the gear side) with great sensitivity and a small metal pin. Ideally, you should close the small hole created with a rubber plug or sticker to prevent dirt from getting into the gear.
During final assembly, we removed iron filings (after all, everything ultimately rotates on the iron mandrel), checked the lubrication and added more where necessary, and finally adjusted the gear position precisely.
This last step is important for the worm gear to prevent the next mechanical blockage from occurring.
Afterward, the gear mechanism ran smoothly.
This Product was added to our catalogue on 05/11/2017.
Categories
Quick purchase
Welcome back!
Last viewed:
Manufacturer
Shipping country


