- Customer group: Guest
-


- Register
- Login
- Your account
- Home
- Details
Products description
Selbstbau-Spektroheliograph Sol’Ex
We have private projects besides the life in store of telescope specialists.
In 2021 I came across by chance the spectroheliograph Sol'Ex of Christian Buil (http://www.astrosurf.com/solex/sol-ex-presentation-en.html). It had fascinated me immediately: should it really be possible to image the Sun in ALL wavelengths with a relatively small effort?
So I read up and started printing the 3D parts. (Fun fact: this project lead to .telescope specialists introducing 3D printing to their business).
I got the optical parts from Shelyak, a well-known spectroscopy equipment manufacturer in France. Since there were delivery problems, it took a little while. The contact person at Shelyak advised me to get an improved set, which I took right away.
Finished assembled it was then almost a year in the closet. I somehow never had time and the priorities were rather in conversion kits for the PST40 and astrographs.
But today I took the time to finally try it.
I got a TS70 mm ED f/6 especially for this project and connected the SolEx to it.
The SolEx lets the light fall through a slit through a collimating lens onto a grating with 2400 lines/mm. This grating can be rotated so that the wavelength can be changed. The selected wavelength is then directed to the sensor.
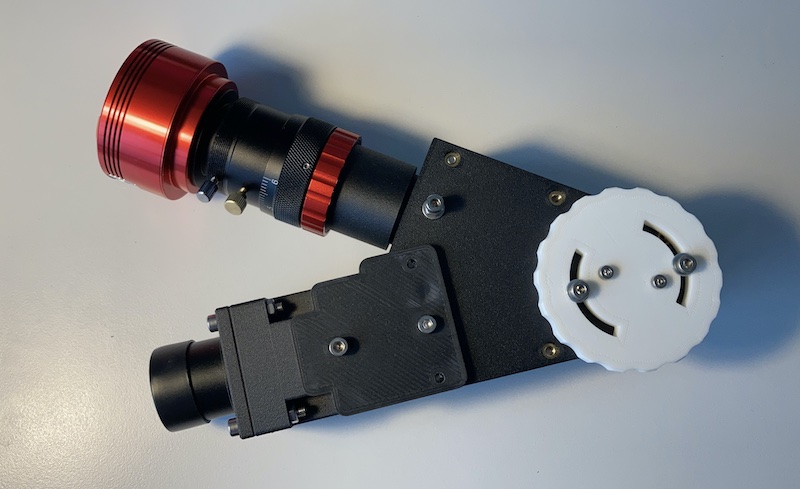
How is the SolEx constructed?
At the bottom left it is flanged to the telescope using a 1.25" adapter. In the first angular chamber sits the 10 µm slit with a length of 4.5 mm. This is the limitation of the size of the solar image. Directly following is a collimating lens, so that the slit is sharply imaged on grating and later in the camera, which is focused to infinity.
In the housing with the white dial sits the rotatable grating to select the wavelength. The light then falls through another lens onto the sensor.
If you want to rebuild it: briefly the procedure (we will make a detailed instruction if necessary, because the original is in French and I understand it only with difficulty):
Remove camera module and set to infinity.
Reinstall camera module and adjust the lens after the slit so that the slit is sharply imaged on the sensor.
Rotate the camera so that the slit image is parallel to the long side of the sensor.
Attach SolEx to the telescope and rotate so that the spectral lines are perpendicular to the east-west direction of motion.
The telescope will be placed on the side of the Sun into which the Sun will move. Tracking is then turned off and as the line passes over the sensor it is recorded using Sharpcap.
The SER file is then converted to a complete image of the sun using the INTI program (http://valerie.desnoux.free.fr/inti/).
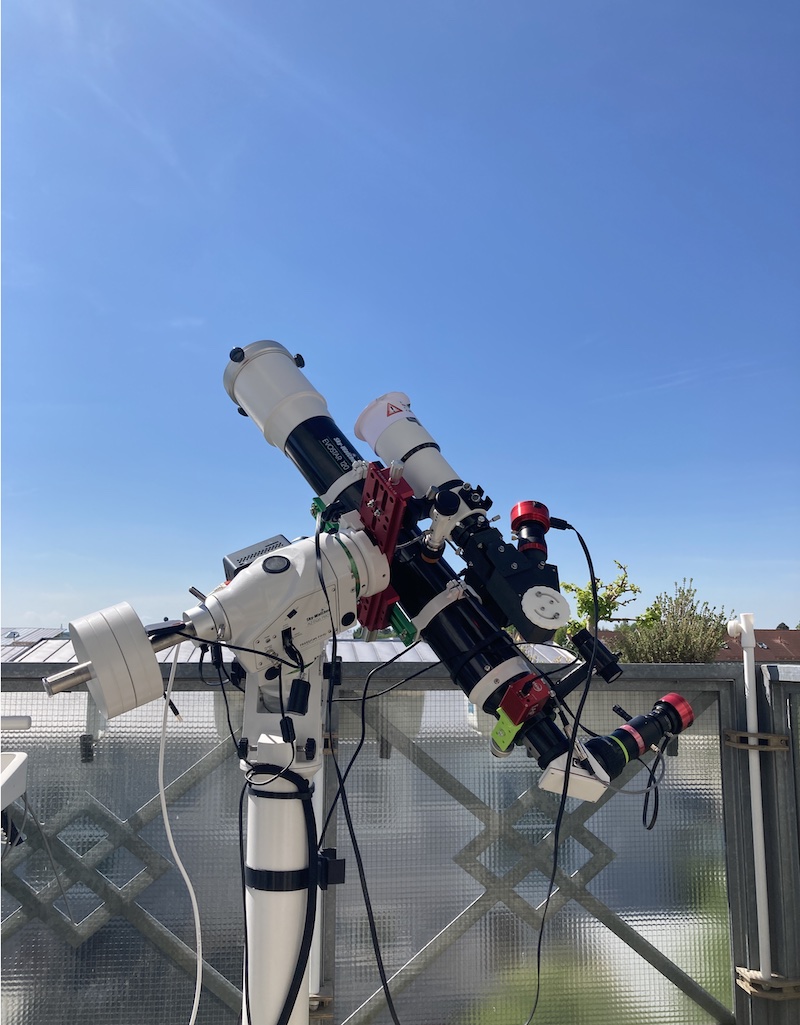
Here the setup on the balcony. In front you can see the TS-Apo 70 f/6 with the attached SolEx.
After a long futile series of experiments, it became clear that the backfocus on the apo is too large, so an extension is needed.
The generated spectrum is focused on the solar limb.
Focusing still needs to be optimized (apple products are simply not suitable for operation in the sun, they become perfect mirrors). The used astrosolar film with an OD of 3.8 (the photographic version) lowers the photon flux too much, so the gain of the camera has to be pulled up too high.
Both points are still being optimized.
The first results are exciting:
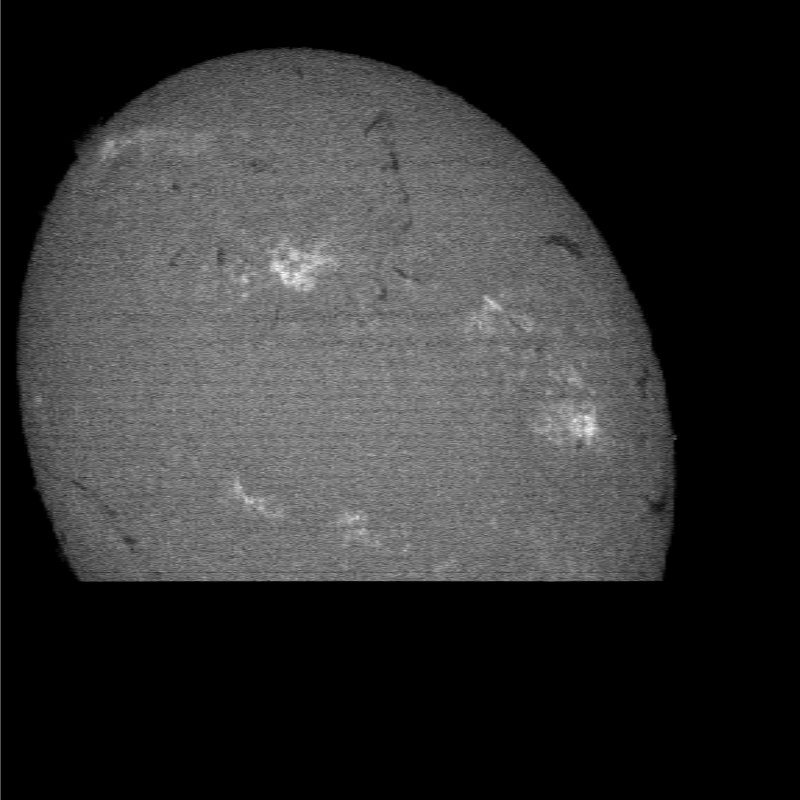
The H-alpha wavelength is very high contrast. The image is deformed, because one parameter was not yet optimally adjusted.
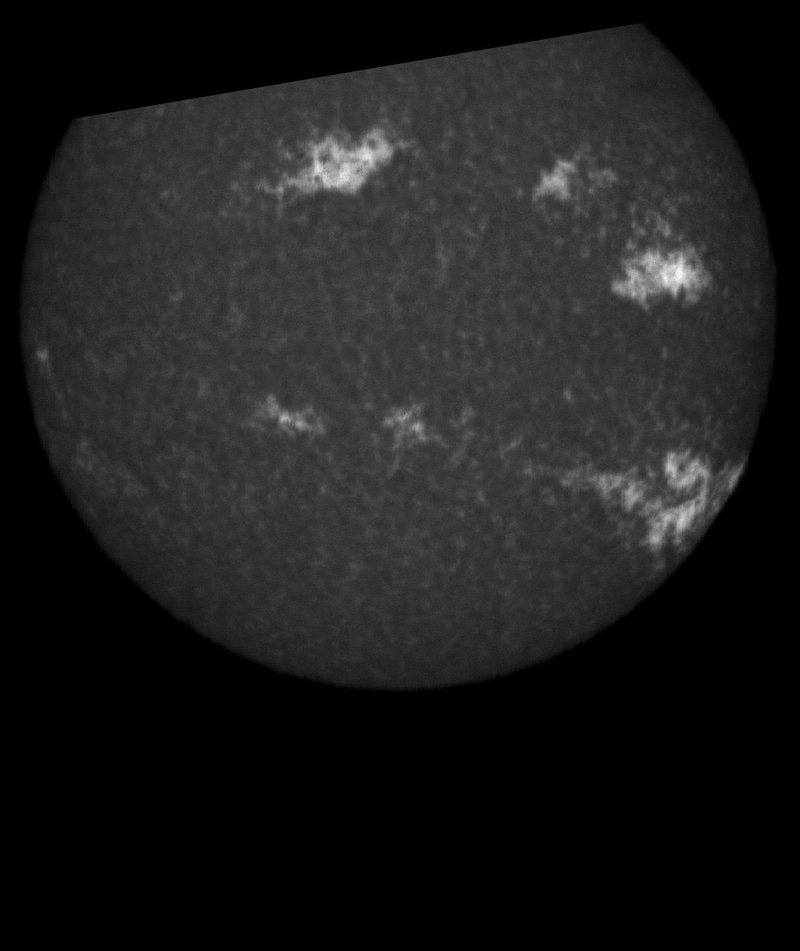
This image shows the CaK line. This was achieved simply by adjusting the grating.
Karsten
This Product was added to our catalogue on 16/05/2022.

Second Hand and Reduced »
More information on your personal page »

Die Box kann unter tpl_modified/boxes/box_miscellaneous.html verändert werden. Die Sprachvariablen befinden sich in der Datei tpl_modified/lang/german/lang_german.custom.