- Customer group: Guest
-


- Register
- Login
- Your account
- Home
- Details
Products description
Comparison of three ways to observe prominences
On my balcony observatory I have three possibilities to view the Sun in dedicated wavelengths.
Using prominences as an example, three fundamentally different solutions will be presented here and the imaging procedure will be described.
Solution 1: Spectroheliograph
The detailed development of this homebuilt project is described in these reports:
part 1: Link
part 2: Link
part 3: Link
For quick info, here are the details of the setup:
The basic telescope is a modified Skywatcher Explorer 150 PDS Newtonian, which has had its primary mirror decoated. So 97% of the incoming solar radiation is no longer reflected, but only 4%. Therefore the spectroheliograph does not need a solar filter like the astrosolar foil from Baader [Link].
(Attention: please never use this modified Explorer 150 PDS visually without a solar filter; for photography a ND3.0 filter is needed in front of the camera!)
Data of the Explorer 150 PDS:
Aperture: 150 mm
Focal length: 750 mm
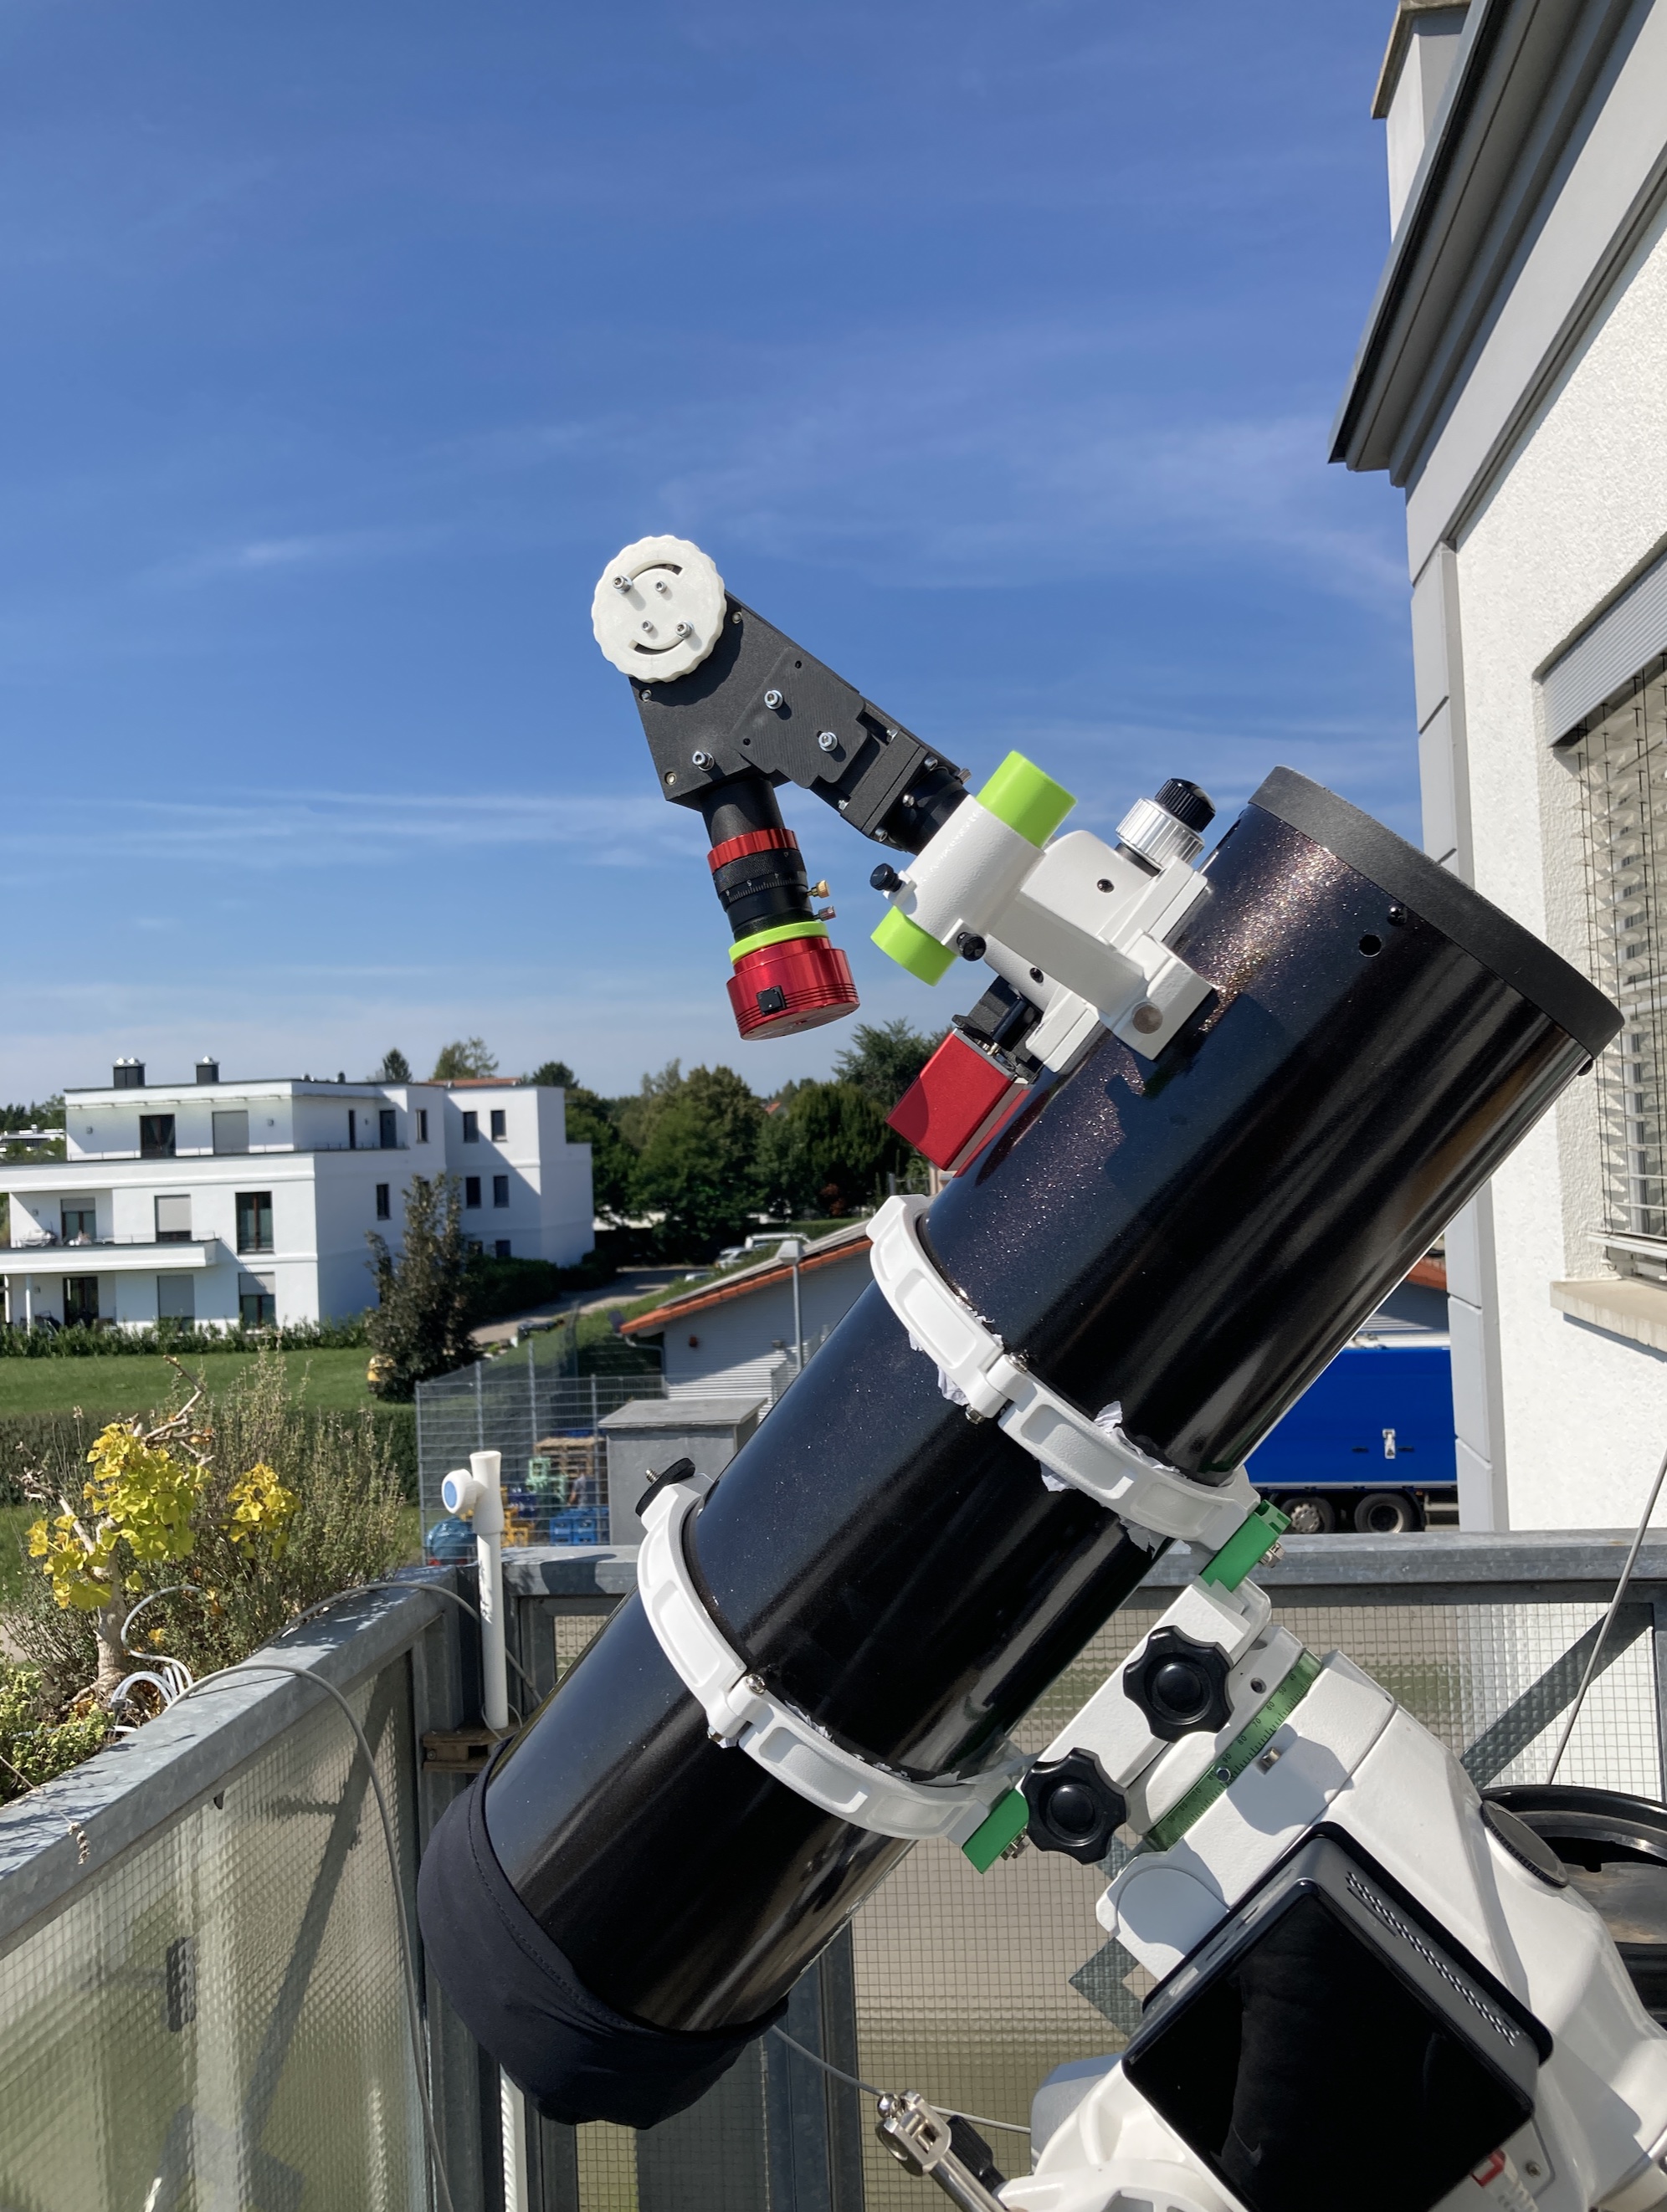
The spectroheliograph Sol'Ex is adjusted to the wavelength H-Alpha (656.28 nm) by rotating the diffraction grating (2400 lines/mm).
The light from the Sun is imaged through a 10 µm slit onto the camera sensor. The narrow strip of the H-alpha line is scanned across the sensor so that software can calculate a complete image of the Sun from it.
With Sharpcap (Firecapture, ToupSky and other software also work) the following steps are done:
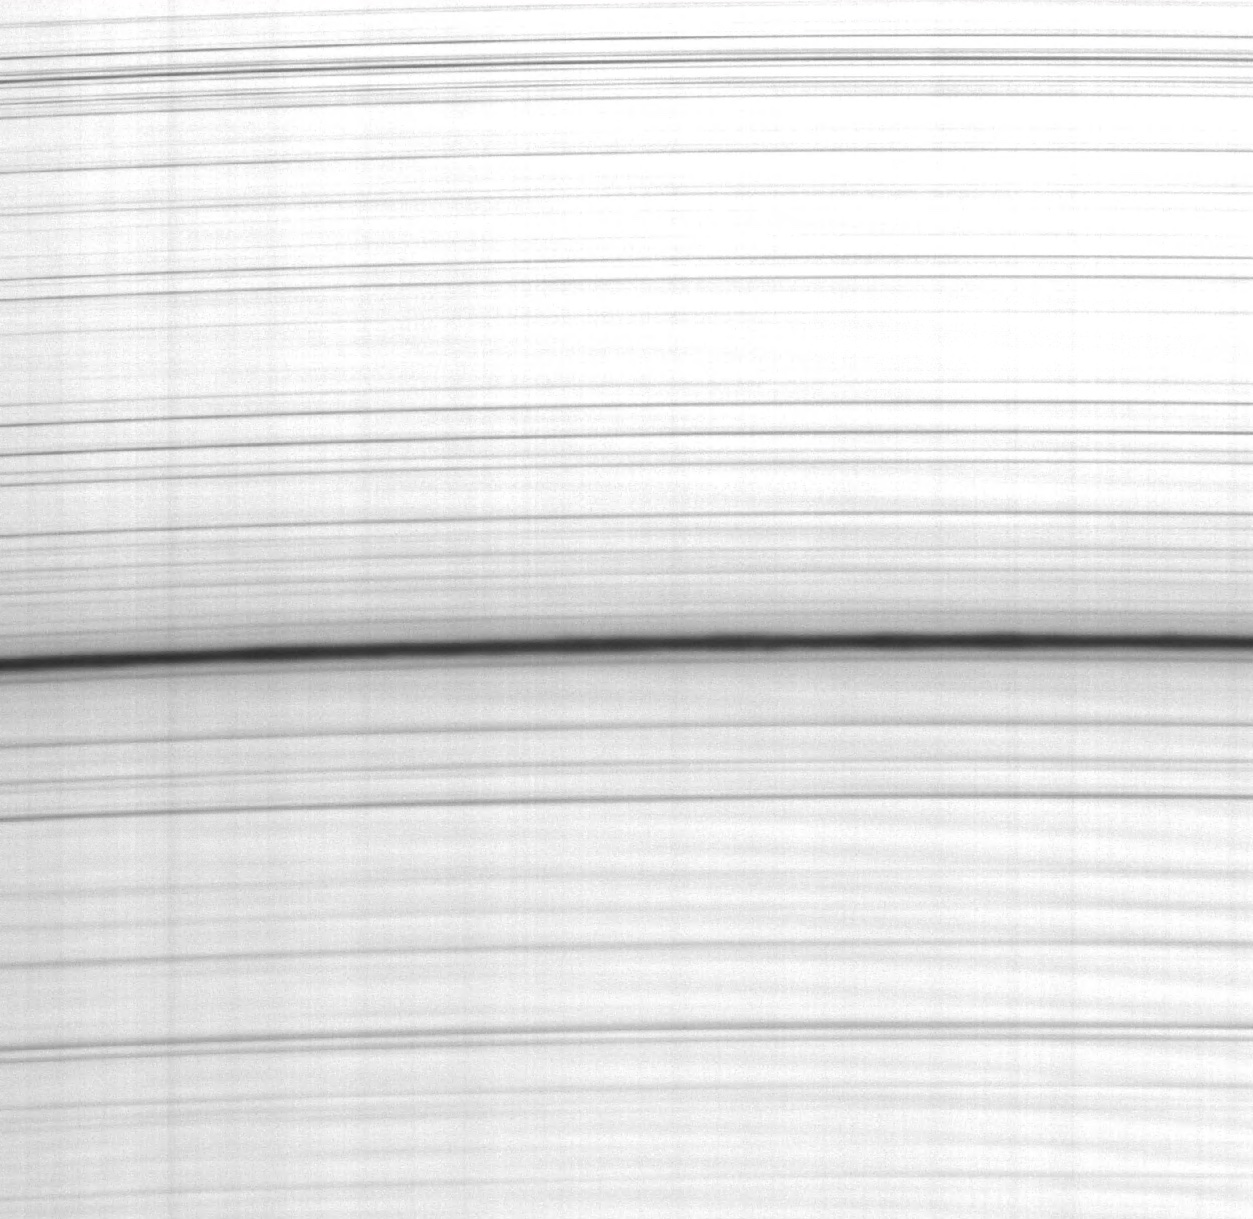
1. this is what the image looks like to the camera sensor. The horizontal stripes are the individual absorption lines of sunlight, the prominent dark line is that of H-alpha. The vertical stripes are those of impurities or irregularities of the slit, but also structures on the solar surface.
2. the area of the H-alpha line is selected using ROI function:

3. tracking is turned off and thus this line is scanned over the sensor. A SER or AVI movie is saved
4. the software INTI calculates the different images, e.g. prominences and sun surface.
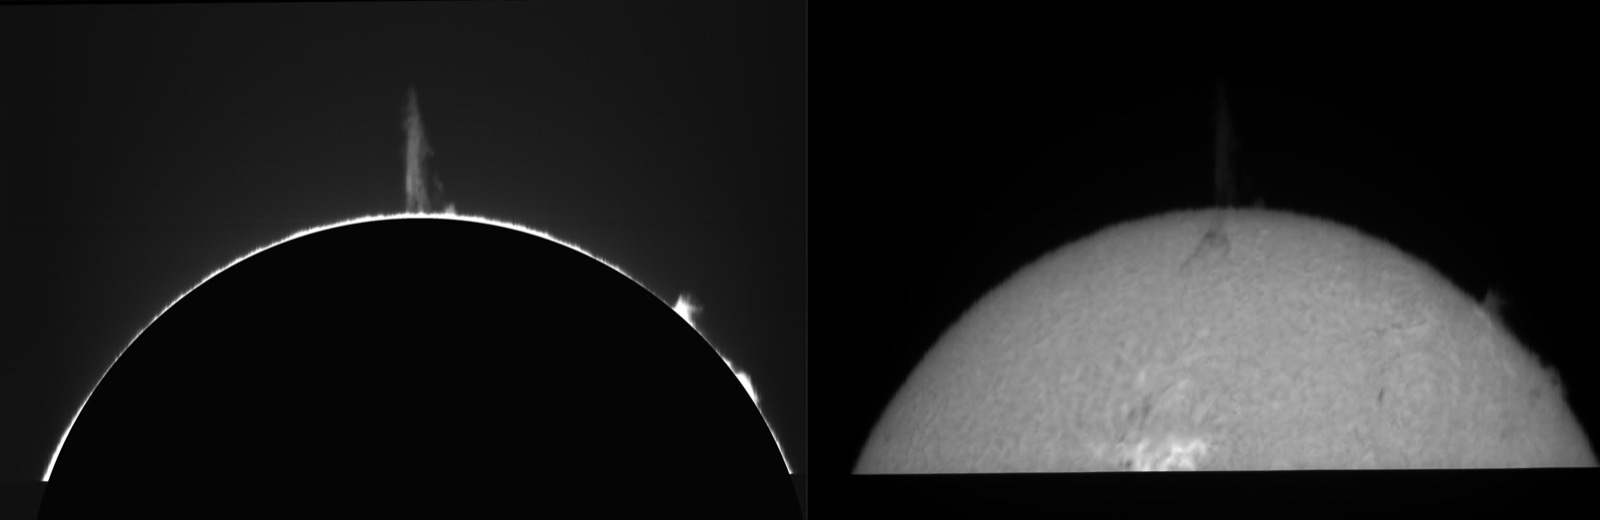
So the sun can not be seen live with this method, it has to be calculated first.
The images have a very high contrast and any desired wavelength can be set.
The spectroheliohgraph can be built by the user and increases the understanding and experience enormously. Due to its pure reflecting optics, the Newtonian also allows investigations outside the visible spectrum in the UV range.
The prominence of 30.08.2022 in the spectroheliograph:
Solution 2: A dedicated H-alpha filter
A Sykwatcher Evostar 120 is equipped with a DERF 110 mm (energy reflection filter) and a SolarSpektrum Sundancer 2. Since this is a monochrome application, an achromat is quite sufficient; an apochromat is not necessary here.
Evostar 120 [Link]
DERF110 [Link]
Adapter DERF110 auf Evostar 120 [Link]
Solar Spectrum Sundancer 2 [Link]
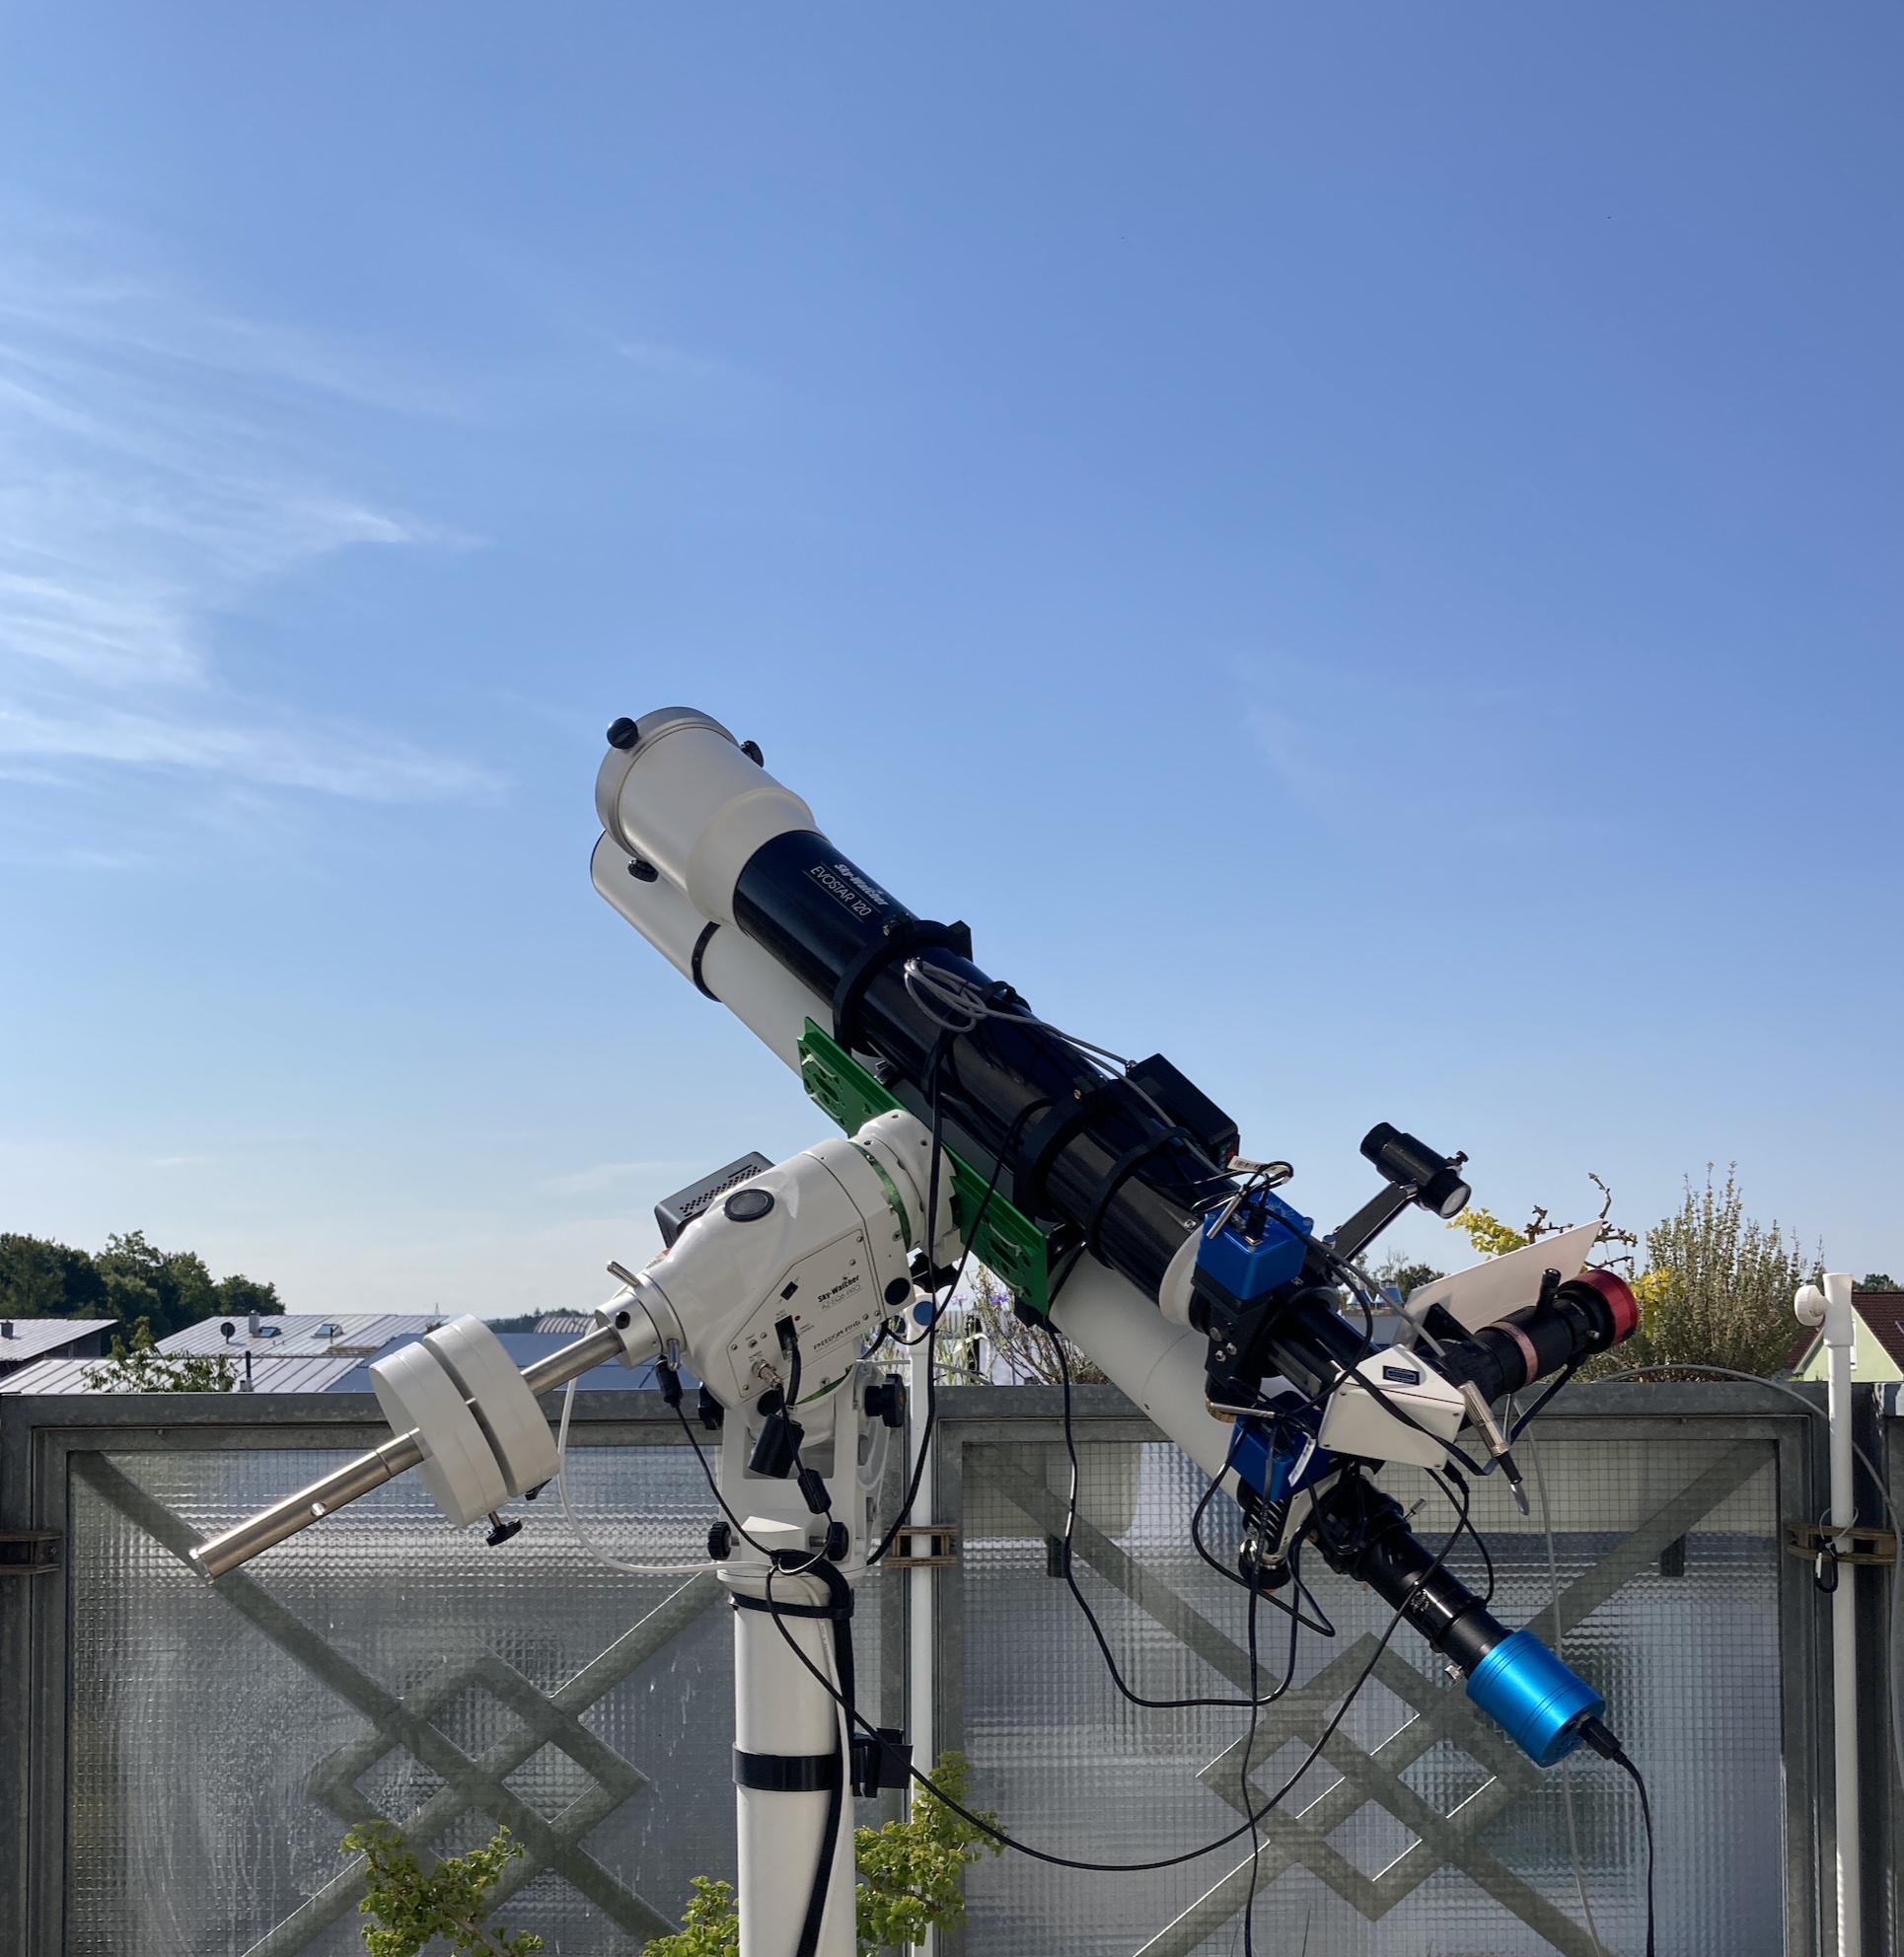
Data Evostar 120
- Aperture 120 mm (but stopped down to 110 mm aperture by DERF110)
- Focal length 900 mm (the Sundancer extends this to 2700 mm).
The workflow is different here:
- capture the live image with Sharpcap or similar
- stack the best images with Autostakkert3!
- sharpen the result with ImPPG
- improve the image with Affinity Photo or Photoshop.
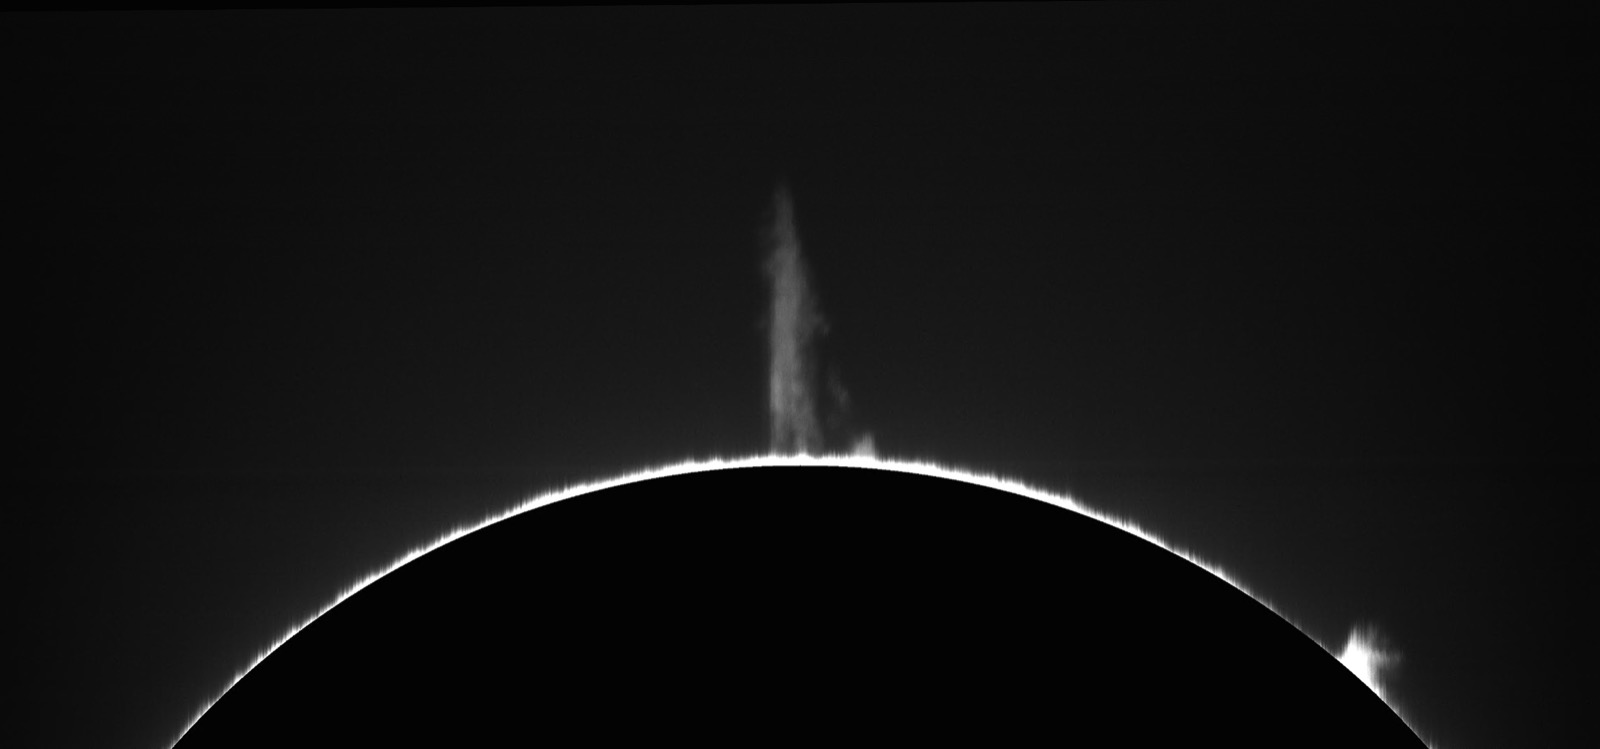
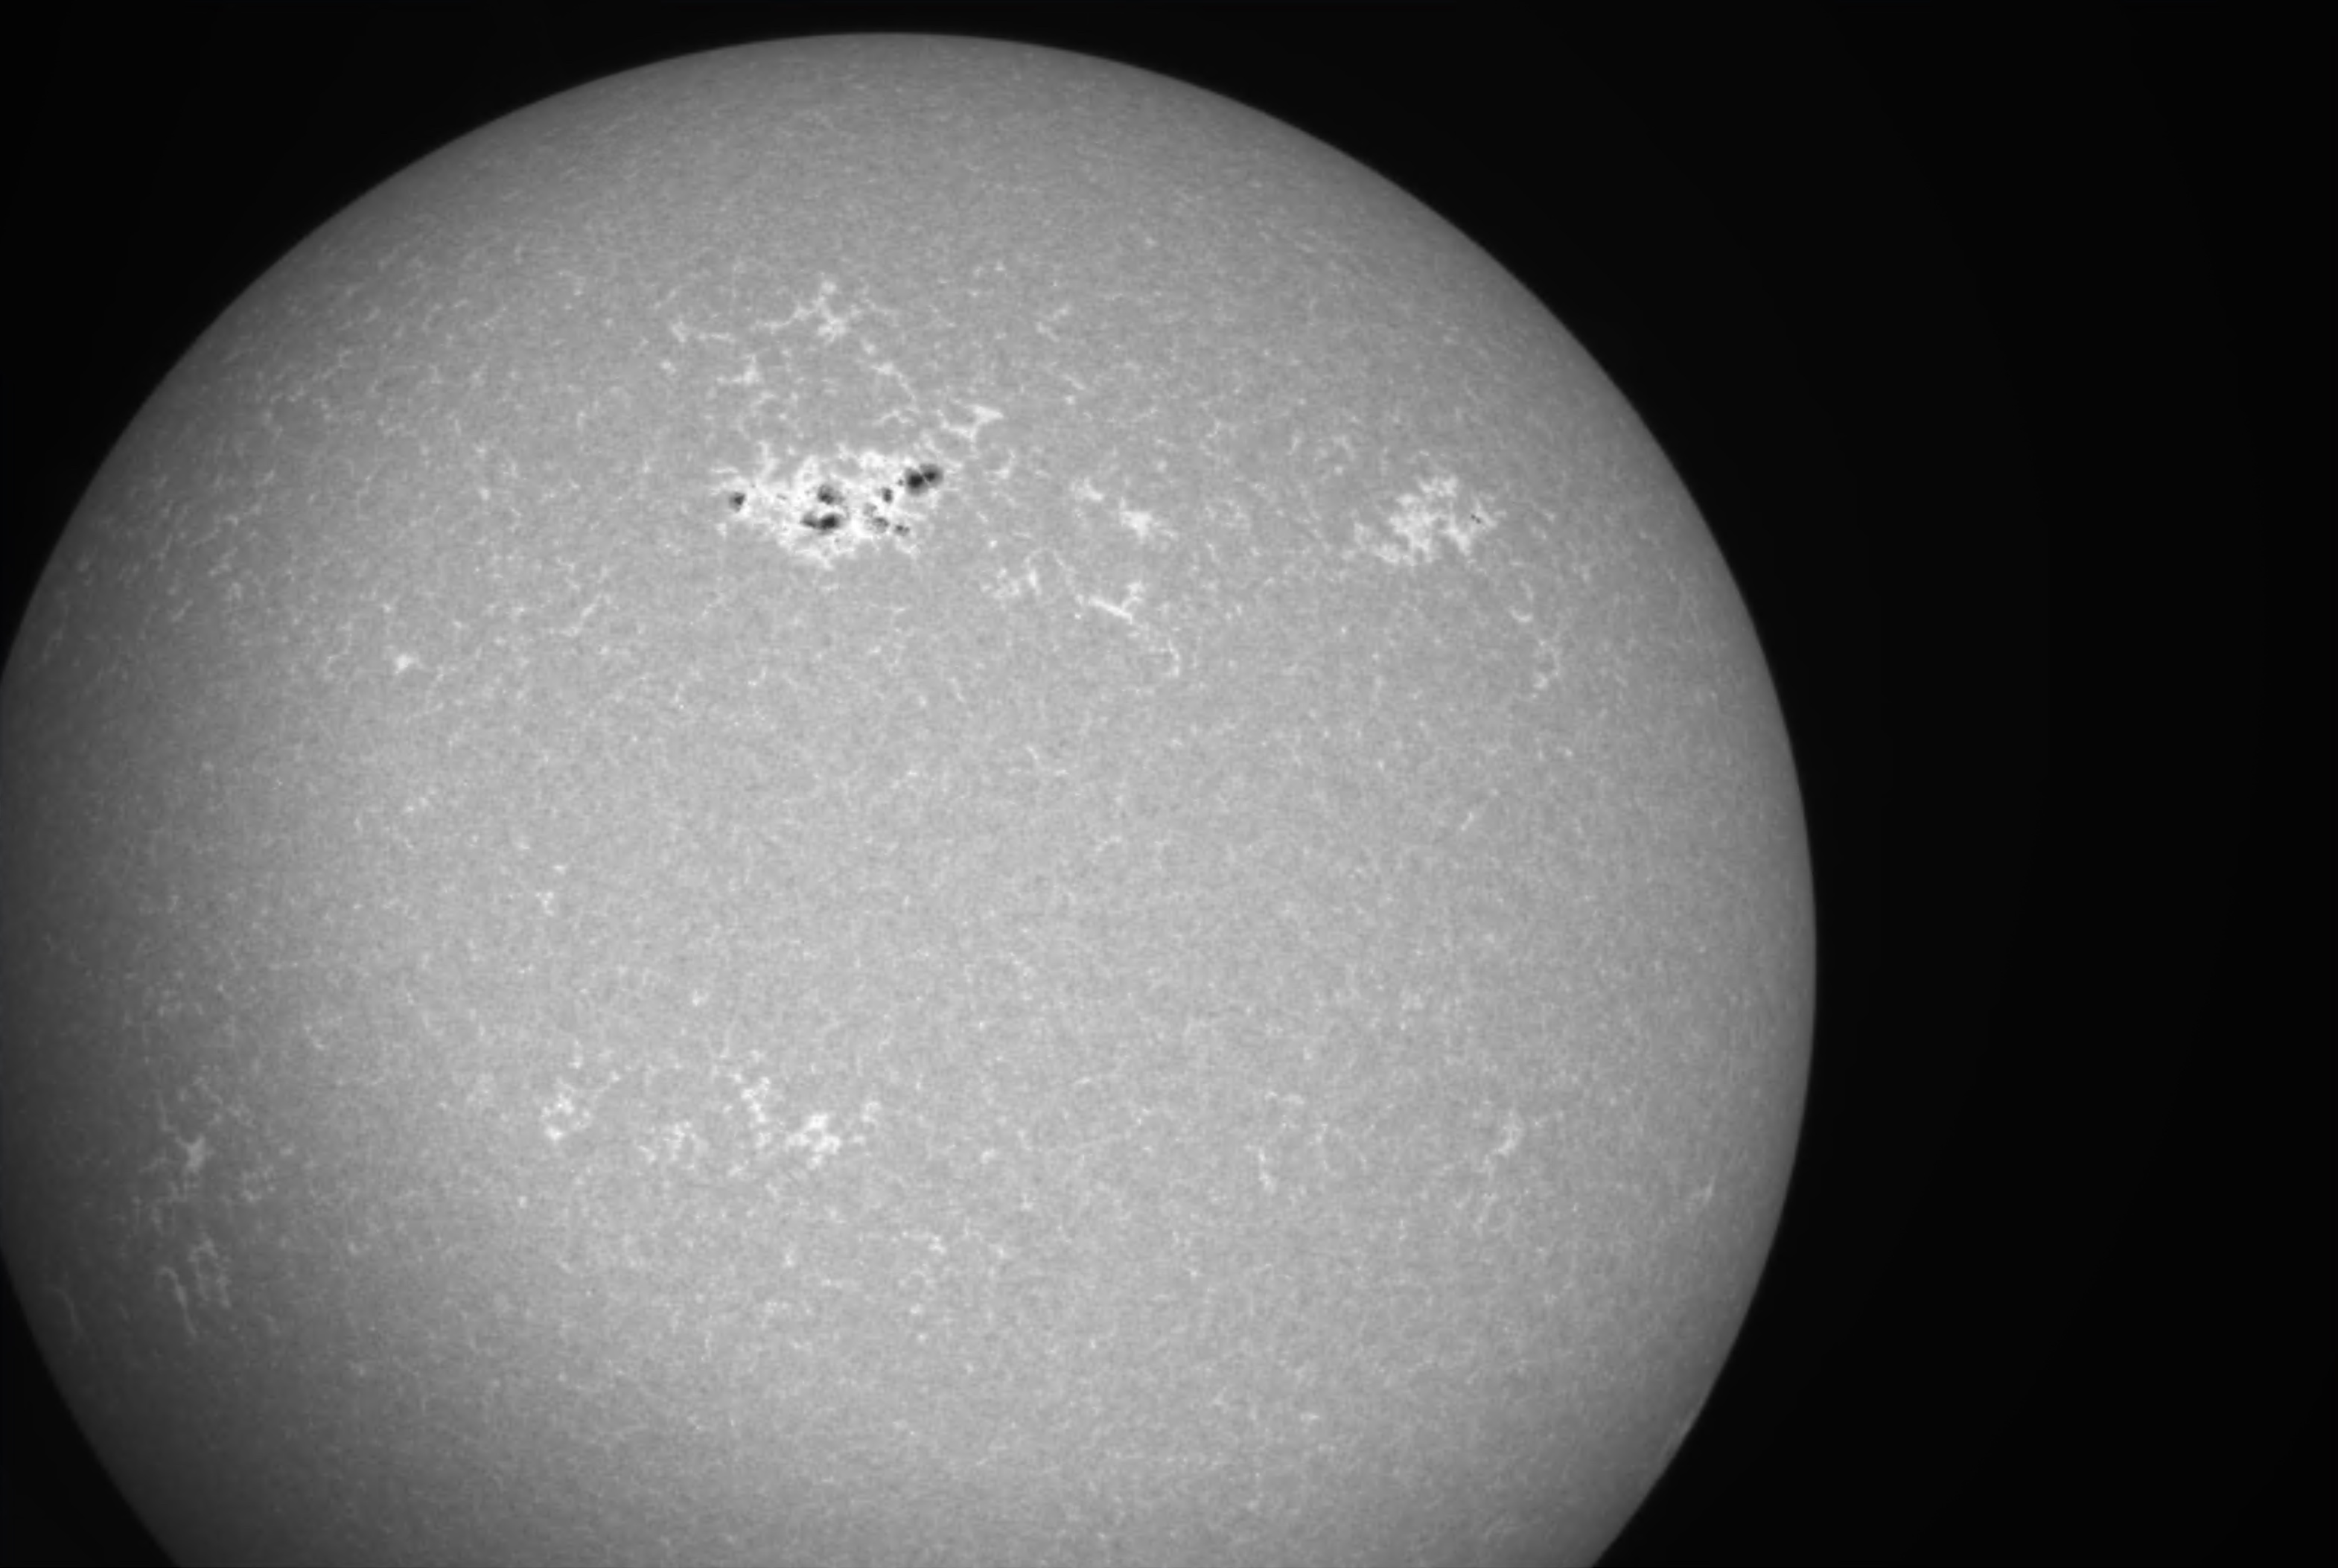
The probuberance of 30.08.2022 in the Solar Spectrum Sundancer 2

Very fine details are visible here.
Advantages of this solution:
The image can be seen live; however, only the H-alpha wavelength can be viewed.
Solution 3: CaK module from Lunt
A TS-Optics 102mm f/11 ED refractor (it went bad in the exhibition and had to go away there) is equipped with a CaK module from Lunt.
Setup:
- TS-Optics 102mm f/11 ED refractor [Link].
- CaK module [Link]
Data TS-Optics 102mm f/11 ED refractor :
- Aperture: 102 mm
- Focal length: 1122 mm
A few notes about this setup:
The CaK module can be used up to 100 aperture of the telescope without objective filters. DA the CaK wavelength is 393 nm, the resolution is much better than with H-Alpha. A 100 mm telescope aperture is quite sufficient to see fine details on the solar surface.
Now we are dealing with the white, rear telescope.
The workflow is identical to the Sundancer 2:
- take the live image with Sharpcap or similar
- stack the best images with Autostakkert3!
- sharpen the result with ImPPG
- improve the image with Affinity Photo or Photoshop
The following image is a raw image(!) directly from Sharpcap:
When the contrast, exposure and a few other small parameters are adjusted appropriately, the prominences become visible in the image shown above (image detail is from top left):
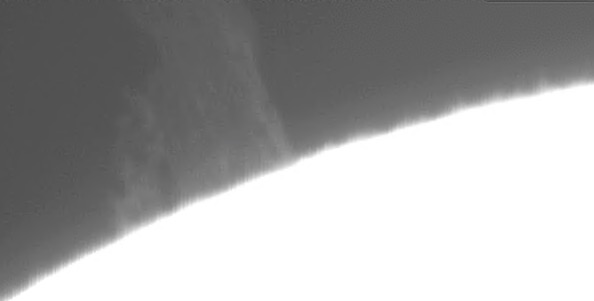
So it is definitely possible to see prominences with a CaK filter. These look partly different than in the H-alpha wavelength!
Overview of the solutions
| Spektroheliograph | Sundancer 2 | CaK Lunt |
Price | cheap, because do-it-yourself | most expensive of the three solutions | middle price range |
Resolution | low, but can be increased by modification of the spectrograph | high resolution | high resolution |
Live image | no | yes | yes |
Direct image comparison
Spectroheliopgraph
Sundancer 2
CaK Lunt
This Product was added to our catalogue on 01/09/2022.


Die Box kann unter tpl_modified/boxes/box_miscellaneous.html verändert werden. Die Sprachvariablen befinden sich in der Datei tpl_modified/lang/german/lang_german.custom.